vocabulary

Storing memories until next year!

We are getting toward the end of another academic year and its time to ask the children to reflect on their learning this year.

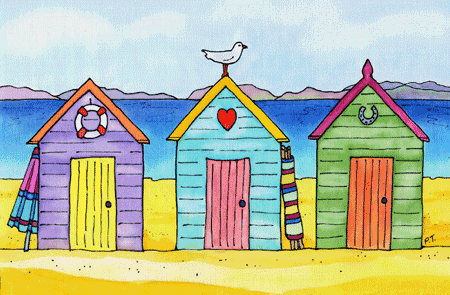
It's almost the Summer holdiays and time to go off perhaps to the beach .Beach huts are places to keep equipment safe until the next time you visit the beach .... and this made me think about asking the children to store language they have enjoyed this year safely ,until we come back off holiday.

I like the idea of beach huts ,because they are bright colourful and can act as "piggy bank visuals" to show how we need to collect,collate,categorise and  store prior learning and our new knowledge this year.Also a great opportunity for AfL for both the child and yourself!  

All you need are boxes with rooves, coloured in bright primary colours.The rooves need to be detachable, so you can lift off the roof of a hut and put written cards inside.Each beach hut needs a sign "nouns" or "adjectives " or "verbs" etc. 

The DFE POS asks us to encourage children to "broaden their vocabulary" and I think it is really important that we help our young learners to understand how you store this vocabulary, ready for use another time.

So here is the idea!

  • Ask each child needs a rectangular piece of card with which to create a postcard.Once finished they will post this card in one of the class beach huts.
  • On one side of the card the children need to write the address. (Does the card need to be sent to the nouns or adjectives or verbs hut etc?).This means that their postcard will be stored in the correct beach hut if you have more than one category of hut.
  • Instead of a stamp the children should draw their own face and add their name (this means you can see who has written the card and also hand back out next year to the correct child)
  • Where you normally write a message on a postcard,the children need to write down key language they have learnt and like the look or sound of this year.They need to make sure that the words are written on the correct postcard- are the words nouns, adjective,verbs etc?
  • Each postcard needs visual symbols on the other side- drawn by the children to represent the words they have selected and want to store and have written down in their message section.
  •  
  •  

With our Year 3 learners we have been focusing very much on nouns.... so let's have our own "noun beach huts" postcard collection.

With our Year 4 learners we have been focusing on nouns and adjectives - so let's have own beach huts postcard collections - one for nouns and one for adjectives.

With our Year 5 and 6 learners we have focused on nouns, verbs and adjectives plus we may have considered prepositions and conjunctions too.

We are going to need several beach hut postcard collections.

  • Now post the cards in the correct beach huts
  • Take time to bring out cards and ask the sender to try to tell the class the words they have put on their postcard and what type of words these are.
  • Take time to look at the pictures too.
  • Finally discuss how we use our memories to store language and challenge the children to try to remember some of their written messages on the postcards right through until the start of school in September!  
  • Maybe you will be able to hand the cards back out at the start of the year and see if the children can still recognise and understand the words on their postcards

Twizzle Stick Opposites!

Being in the target language country allows you to look for marvellous books - just to give you new inspiration!
In Spain last week I found this simple infant book and this led mt to think of a  creative idea.....that could be really useful to practise opposites with LKS2!  

The book in itself is a marvellous joining in text to practise opposites.The children can swivel the objects in the middle of the hard card page, can anticipate the opposite phrase used with  the next page.You can revisit the book  and play anticpation or memory games  too.

This made me think of "twizzle stick opposites"!
All we are going to need are lolly sticks,firm card, glue and seloptape,oh and some scissors!


First a little bit about the book!
The book shows  a picture of an item on each page and and a key word.It's opposite word and the same picture( but drawn to convey the new meaning) are shown on the reverse side of the page.The picture inbetween can be swivelled to match the key word .For example there is a smiley face with "contento" above it and when you swivel the face it is a sad face on the other side and reads "triste"

The pictures can be turned over or swizzled around! Just like this tortoise it can be "derecha" or can be flipped around and on the next page "izquierda"


Twizzle Stick Opposites Game 

  • This is my way of creating an interactive game to practise opposites using a physical activity.
  • Year 3 or 4 could create the twizzle sticks and share with KS1.
  • It will also help the Y3/4 children have a better understanding of the concept of "opposites" plus a physcial and visual memory of key words to describe or place objects.
  • I anticipate that each child should make 5 swizzle sticks and therefore explore the meaning of 10 words in 5 pairs of opposites.
  • The twizzle sticks can just have opposites written on them or could also have the nouns of ther objects the children have used too, hidden under a lift and reveal flap.


Making Twizzle Sticks

  • Ask the children to think of 5 pairs of opposites in English
  • Can they now find these woirds in the bilingual dictionary and cross reference their meaning in the front of the bilingual dictionary to check its meaning.(This could be a pair activity where the partner cross reference words and feeds back what they find)
  • The children need to write each word out in the target language on a separate small strip of firm card.
  • The children can now put the words with their opposite word in to 5 piles of opposite words e.g contento/triste or izquierda/derecha
  • For each pair of opposite words the children now need to think of an object that they can draw and use to explain both of the opposite words.For example with contente/triste - this will probably be the face of a child/person/animal etc or maybe with directions it could be a vehicle.
  • The children should draw the objects (twice per twizzle stick) so that the images of the objects conveys the meaning of the opposite words .
  • The drawings needs to be attached with glue or selotape to the top third of the lollipop stick and the correct opposite word card that they have chosen and written out needs to be glued or selotaped below the correct image of the object.


The Twizzle Stick Year 3 or Year 4 Game!

  • Each child shares with a partner all the twizzle sticks they have made and say the opposite word as they show each of the images.They will need to twizzle their sticks to share all the images and the opposite words
  • the first child lays out their sticks on the table with one side of the twizzle stick showing.
  • The second child  selects a twizzle stick , picks it up says the word that is face up on the stick, anticpates and says the opposite word and then twizzles the stick to see if he/she was correct.
  • If he/she is correct then the stick now belongs to the second child.
  • Which child wins the most sticks from am partner? 
  • Add extra challenge by giving each child a strip of coloured paper long enough to place across the five twizzle sticks of one player.The strip of paper should not conceal the picture but should conceal the face up word.
  • Who can now remember the face up word and the opposite word written on the face down side of the stick?